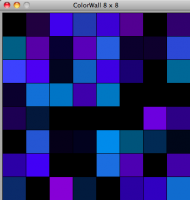
Color Wall
The ColorWall is a framework for implementing and displaying effects for a wall of pixels. During this workshop, you will write your own ColorWall and design effects for it.


You can also see the ColorWall in action here: http://vimeo.com/16522975.
Download the files you will need here:
- Linux/Mac Users
- Windows Users
Basic Programming
First let’s work through some basic terminal exercises to learn how we use Python to work with numbers & text.
Workshop Exercises
Unzip/Untar the workshop exercises and go through them.
Layout
The ColorWall code consists of 3 files:
- run.py – takes arguments from your environment (like a specified width and height for the wall), set up the wall and effects, and run them.
- wall.py – the logic behind the matrix of squares that make up the wall. This file has a comment block at the top that summarize the interface that you will use when programming your own effects.
- effects.py – where effects live. This is the main file that you’ll be editing during the workshop.
Run the ColorWall
If you want to try doing a git clone, you can grab the ColorWall code from Git Hub and run it from there, otherwise go into the directory that was created when you unzipped/untarred the ColorWall download.
Run the example effects:
On Windows, assuming the ColorWall software was downloaded to C:\Users\yourusername\Desktop\ColorWall
run \Python27\python.exe "C:\Users\yourusername\Desktop\colorwall\ColorWall\run.py"
On OS X, assuming the ColorWall software was downloaded to ~/Desktop/colorwall/ColorWall run
python ~/Desktop/colorwall/ColorWall/run.py
On Linux, assuming the ColorWall software was downloaded to ~/Desktop/colorwall/ColorWall run
python ~/Desktop/colorwall/ColorWall/run.py
Other Resources
http://openhatch.org/wiki/Boston_Python_workshop/Friday_handout#Setting_up_the_ColorWall
https://lsblakk@github.com/lsblakk/ColorWall.git ColorWall code on GitHub
http://en.wikipedia.org/wiki/HSL_and_HSV has the explanation for what HSV color space means. What it boils down to for the purposes of our project is this: each pixel gets 3 values: hue (e.g. am I red, green, or blue), saturation (am I pale or intense), and value (am I bright or dark). effects.py has example effects that exercise hue, saturation, and value independently.

